How to Install China Top Solar Street Lights Safely

Time:2026-09-26 Author:Madeline
0%

Installing China’s top solar street lights safely requires more than selecting a bright lamp. It demands careful planning, reliable equipment, and disciplined work at height. Before installation, inspect the solar panel, battery, controller, LED fixture, cables, and mounting hardware. Check every component for cracks, loose terminals, or water damage. A small defect can become a serious failure after heavy rain.

Solar lighting consultant Andy Tyson states, “A solar street light is only as reliable as its foundation, wiring, and maintenance plan.” This principle guides the entire process. Survey the location during daylight and at night. Confirm that buildings, trees, and signs will not shade the panel. Mark underground utilities before digging. Use a stable concrete foundation, correct anchor bolts, and a level pole. Do not guess the foundation depth.

How to install solar street lights safely also involves electrical protection. Keep connectors dry and sealed. Follow the manufacturer’s wiring sequence. Protect cables inside conduits, especially near the ground. Connect the battery only after checking polarity. One reversed connection may damage the controller. Wear insulated gloves and use certified lifting equipment. Never work beneath a raised fixture without securing it.

There may be mistakes. A site can look sunny in the morning but become shaded in winter. Recheck it. Test the light through a full night cycle, inspect the pole after strong wind, and record maintenance dates. China-made solar street lights can perform well, but quality depends on correct installation, honest inspection, and continual care. Safety comes before brightness.
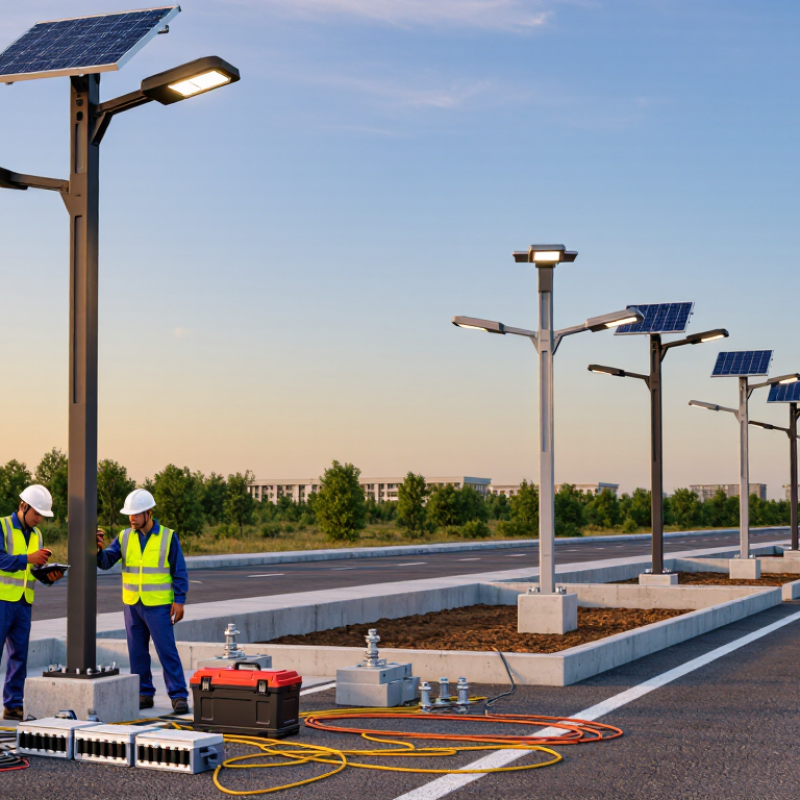
How to Install China Top Solar Street Lights Safely

Site Assessment and Safety Planning for Solar Street Light Installation

How to Install China Top Solar Street Lights Safely

Site Assessment and Safety Planning for Solar Street Light Installation

A safe solar street light project begins with a detailed site assessment. Walk the proposed route during both daylight and evening hours. Record road width, pedestrian movement, drainage, nearby trees, and existing utility lines. A small obstruction can create a large maintenance problem later.

Check sunlight across the full year, not only on a clear afternoon. Buildings, seasonal branches, and dust can reduce charging performance. Confirm soil strength before selecting foundation dimensions. Loose ground may require deeper concrete support and professional structural review. Measure wind exposure, especially on open roads and coastal sites. I have seen good equipment fail because the location was treated as ordinary. It was not.

Tips: Mark each pole location with bright paint. Keep access paths clear. Use current drawings, underground utility checks, and local electrical requirements before excavation. Prepare a lifting plan, traffic controls, and emergency contacts. Workers should use helmets, gloves, eye protection, and fall protection where needed. Isolate electrical circuits before connection. Test grounding, cable insulation, battery protection, and automatic lighting controls before opening the road.

Leave space for future repairs. This is often missed. Review the plan with an electrical professional and the site owner, then revise it after a trial installation. A pilot pole can reveal glare, shadows, drainage issues, or poor visibility that drawings cannot show. Weather can change quickly, so postpone lifting during strong wind or storms. Safety planning is never perfectly finished. Recheck conditions before every installation shift.

How to Install China Top Solar Street Lights Safely: Site Assessment and Safety Planning

Ingress protection is a key safety requirement for outdoor solar street lights. Under IEC 60529, the first IP digit indicates protection against solid particles, while the second digit indicates protection against water.

Planning note: Verify that the luminaire, junction box, controller, and battery enclosure have an IP rating suitable for local dust, rain, flooding, and cleaning conditions. An IP6X rating means dust-tight protection, while IPX5, IPX6, and IPX7 indicate protection against water jets, powerful water jets, and temporary immersion respectively.

Selecting Suitable China-Made Solar Street Light Components

How to Install China Top Solar Street Lights Safely

Selecting suitable China-made solar street light components requires more than comparing prices. Measure the site first. Check daily sunlight, winter shadows, wind exposure, road width, and required lighting levels. A larger panel cannot fix poor placement. Use a monocrystalline panel with a clear technical datasheet, and match its voltage to the controller and battery.

Battery selection deserves careful attention. Lithium iron phosphate batteries usually offer stable cycling and safer thermal performance. Confirm capacity at the local temperature, not only under laboratory conditions. The controller should include overcharge, over-discharge, short-circuit, and reverse-polarity protection. It should also support programmable dimming. Small details matter.

Choose LED modules with verified lumen output, suitable color temperature, and effective heat dissipation. Select a sealed enclosure rated at least IP65, while coastal or dusty sites may need stronger protection. Check impact resistance for exposed roads.

I have seen installations fail because the pole foundation was ignored. The pole must match wind-load calculations, anchor-bolt dimensions, and cable routing requirements. Ask for independent test reports, electrical safety documentation, and clear warranty terms. Inspect samples before bulk delivery. Test twice. Do not trust a polished catalog alone.

Some specifications look impressive but omit operating temperature, battery cycle data, or actual illumination results. A small pilot installation can reveal glare, weak charging, or unexpected shadowing before the whole project is installed.

Preparing the Foundation, Tools, Wiring, and Mounting Area

Choose a firm, well-drained location for the solar street light foundation. Check underground cables before digging. A utility map is useful, but it is not always perfect. Confirm the location manually and follow local safety requirements.

Prepare a tape measure, spirit level, torque wrench, insulated screwdrivers, crimping tools, cable glands, and protective gloves. Set the anchor bolts inside a reinforced concrete base. Keep their spacing accurate. The pole must stand level after the concrete cures fully. Rushing this stage creates expensive alignment problems. I once measured only the bolt circle and missed the base plate thickness. That small oversight delayed mounting.

Keep the battery, controller, and wiring area dry and accessible. Match cable polarity carefully. Red is commonly positive, but never rely on color alone. Check every connection with a multimeter before closing the enclosure. Protect cables inside conduit, and leave a gentle drip loop near outdoor entries. Tighten terminals firmly, not excessively. Over-tightening can damage the connector. A qualified electrician should inspect the circuit when required.

Clear branches, walls, and stored materials around the mounting area. The panel needs direct sunlight for most of the day. Aim the light toward the intended road or walkway, then adjust its angle after sunset. Secure every bolt with the specified torque. Do not stand beneath an unsecured fixture. Recheck the pole after strong wind or heavy rain, because a stable installation can still settle unevenly.

How to Install China Top Solar Street Lights Safely - Preparing the Foundation, Tools, Wiring, and Mounting Area

Installation Stage Tools and Materials Recommended Checks and Actions Safety and Acceptance Criteria
Plan the installation site Site plan, measuring tape, compass, utility-location information Confirm pole locations, access for installation equipment, and the expected direction of sunlight. Check for trees, buildings, and other obstructions that may shade the solar panel. Locate underground utilities before excavation. Follow local requirements for setbacks, traffic control, and work near roads.
Verify equipment and drawings Installation manual, pole and luminaire drawings, packing checklist Confirm that the pole, luminaire, solar panel, battery, controller, fasteners, and anchor-bolt template match the approved project specifications. Use the manufacturer’s installation instructions and project engineering documents; component arrangements and connection details can differ between systems.
Prepare the foundation Shovel or excavator, formwork, concrete, reinforcement, level, anchor-bolt template Excavate and construct the footing to the dimensions and reinforcement details specified for the site. Position anchor bolts with the correct spacing, projection, and orientation using a template. Foundation dimensions depend on soil conditions, pole height, wind exposure, and the approved design. Do not use a generic footing size in place of engineering specifications.
Allow the foundation to cure Concrete records, protective covers, curing materials Protect fresh concrete and allow it to reach the strength required by the project specifications before installing the pole or applying loads. Follow the concrete supplier’s guidance and the project engineer’s requirements. Do not assume that a fixed number of days is suitable for every mix or weather condition.
Prepare tools and protective equipment Wrenches, torque wrench, insulated tools, lifting equipment, safety glasses, gloves, hard hat, fall protection Inspect tools, lifting slings, ladders or platforms, and electrical test equipment before use. Check that the torque wrench is appropriate for the specified fasteners. Use trained personnel and suitable lifting equipment. Establish an exclusion zone beneath suspended loads and follow site-specific fall-protection procedures.
Assemble the pole and solar components Pole sections, solar panel, luminaire, mounting brackets, approved fasteners Assemble components in the sequence shown in the installation manual. Orient the panel for the site’s hemisphere and project design, then verify that its position will remain clear of shading. Secure every component using the specified fasteners and tightening values. Keep panels covered or otherwise protected from unintended exposure during electrical preparation when required by the instructions.
Make electrical connections Insulated tools, cable connectors, cable ties, multimeter, wiring diagram Identify conductors and polarity from the system wiring diagram. Connect the solar panel, battery, controller, and luminaire in the sequence specified for that system; protect and secure cables against abrasion and water entry. Isolate the system before wiring. Never rely on wire color alone to determine polarity, and do not disconnect PV connectors under load unless the equipment instructions specifically allow it.
Mount the pole and luminaire Crane or approved lifting device, tag lines, level, torque wrench Lower the pole carefully onto the anchor bolts, fit the specified washers and nuts, and check that the pole is plumb. Aim the luminaire according to the lighting plan. Keep personnel clear of the lift zone. Tighten anchor nuts and mounting fasteners to the project or manufacturer’s specified values; do not substitute an unverified torque value.
Test and document the installation Multimeter, controller instructions, inspection checklist Check connections, cable protection, panel position, luminaire operation, and controller status. Confirm the lighting schedule and any sensor settings using the supplied instructions. Correct faults before handover. Record inspection results and confirm that the installation meets applicable electrical, structural, and local safety requirements.

Important: Foundation design, electrical connections, lifting procedures, and fastening requirements must follow the approved project drawings, equipment instructions, and applicable local codes. Have qualified personnel review site-specific conditions.

Installing the Pole, Solar Panel, Battery, and LED Light

How to Install China Top Solar Street Lights Safely

Install the pole on firm, level ground that can resist wind and vibration. Mark the foundation bolts before pouring concrete, then confirm their spacing with the pole base. Allow the concrete to cure fully. Do not raise a heavy pole on soft ground. Use lifting equipment, gloves, helmets, and a controlled work area. Keep the pole vertical with a spirit level. A small tilt can redirect the light and stress the foundation.

Mount the solar panel where buildings, trees, and cables will not shade it. Face and angle it according to the local sun path, not guesswork. Tighten every bracket, but avoid crushing the panel frame. Route the cables through protected openings and leave a drip loop near each connection. Place the battery inside a dry, ventilated, and lockable enclosure. Keep terminals covered and follow the supplied polarity diagram. Reverse polarity can damage the controller immediately. It happens.

Attach the LED light securely to the pole arm. Check that its beam covers the intended roadway or pathway. Connect the panel, battery, controller, and lamp only after checking voltage and cable polarity. A qualified electrician should verify grounding, insulation, and local electrical-code compliance. Test charging during daylight and switching after darkness. Inspect loose bolts and cable movement after the first windy night. One overlooked washer can become a real maintenance problem. Photograph the completed wiring and record the test readings for future inspections.

Testing System Performance and Establishing a Maintenance Plan

After installing a solar street light, test the complete system before public use. Measure illuminance at ground level after sunset, not only at the lamp head. Record readings beneath the pole, between poles, and near road edges. The average should match the project specification, while dark spots require immediate adjustment. Check charging current at midday and battery voltage before dawn. One night of testing is not enough.

The IEA PVPS Task 13 reports that crystalline-silicon modules commonly degrade by about 0.5% annually. Use this figure when setting long-term charging expectations. The U.S. Department of Energy also identifies 50,000 hours as a common useful-life reference for LED luminaires. However, heat, dust, poor wiring, and battery aging can shorten actual service life. Field conditions are often less friendly than laboratory tests.

Create a maintenance plan with monthly visual inspections and quarterly electrical checks. Clean the panel when dust visibly reduces output. Inspect cable glands, grounding points, pole bolts, and enclosure seals for moisture or corrosion. Compare battery voltage, charging current, and overnight runtime with the original commissioning records. Keep the data.

Replace weak batteries before winter demand rises. Test motion sensors and dimming schedules after software changes. A practical weakness remains: many projects record installation details poorly. Use dated photographs, meter readings, and signed inspection sheets. That small discipline makes failures easier to diagnose and safer to repair.

FAQS

What should be checked before choosing pole locations?

Walk the route in daylight and after dark. Note road width, foot traffic, trees, drainage, and nearby utility lines. Seasonal shadows matter too.

How can the site’s sunlight be assessed properly?

Check sunlight through the year, including winter shadows from buildings and branches. Dust can also reduce charging. A clear afternoon is not enough.

What affects the foundation and pole design?

Check soil strength, drainage, and wind exposure before setting foundation dimensions. Loose ground may need deeper support and professional review. A small bolt-spacing error can delay mounting.

Which details matter when selecting the solar components?

Match panel voltage with the controller and battery. Review operating-temperature data, battery capacity, verified light output, and heat dissipation. Catalog figures can be incomplete.

What battery and controller features are useful?

Confirm battery performance at local temperatures. Choose a controller with overcharge, over-discharge, short-circuit, and reverse-polarity protection. Programmable dimming is useful.

How should wiring connections be checked?

Match polarity, then verify connections with a multimeter before closing the enclosure. Protect cables in conduit and keep outdoor entry points dry. Never trust wire color alone.

What safety steps are needed before lifting a pole?

Check underground utilities and prepare traffic controls, a lifting plan, and emergency contacts. Use suitable protective gear. Postpone lifting during strong winds or storms.

Why install a pilot pole before the full project?

One test pole can reveal glare, shadows, weak charging, or drainage problems. Drawings do not show everything. Recheck the site after bad weather.

Conclusion

This guide explains how to install solar street lights safely through a clear, practical process. It begins with a detailed site assessment, including sunlight availability, ground conditions, traffic risks, drainage, and lighting requirements. A safety plan should be prepared before work starts, with suitable protective equipment, secure working zones, and procedures for handling tools and electrical components. The guide also covers how to select compatible, reliable China-made solar panels, batteries, LED lamps, controllers, poles, and mounting hardware according to local conditions and project needs.

Before installation, prepare the foundation, tools, wiring, and mounting area carefully. The pole must be firmly anchored and correctly aligned, while the solar panel should face the best direction for daily sunlight. Batteries, controllers, and LED lights should be connected according to the system design, with all wiring protected from moisture and physical damage. Finally, test charging, lighting performance, automatic controls, and structural stability. A regular maintenance plan should include cleaning the panel, checking connections, inspecting the battery, and replacing worn components when necessary.

Madeline

Madeline

Madeline is a dedicated marketing professional with a wealth of expertise in our company's core offerings. With a keen understanding of the industry, she brings a unique perspective to her role, consistently delivering high-quality content that highlights the superior aspects of our products. As......