Choosing the 2026 best solar street lights involves more than comparing brightness, battery capacity, and warranty length. A reliable system must also remain serviceable after years of rain, dust, heat, and overnight operation. From practical site inspections, small problems often appear first: a dusty panel, a loose bracket, or a light that switches on late.
What maintenance do solar street lights require? The answer depends on climate, product design, traffic conditions, and installation quality. Technicians should inspect solar panels for dirt, bird droppings, shading, and surface damage. They should check battery enclosures, cables, connectors, poles, and mounting bolts. LED fixtures and motion sensors also need testing. These details can affect charging performance and lighting consistency.
Maintenance should follow the manufacturer’s schedule, not guesswork. In many locations, panels need seasonal cleaning, while batteries require periodic testing and eventual replacement. A maintenance log should record voltage readings, inspection dates, weather exposure, and unusual dimming. Clear records support safer decisions and more accurate budgeting. They also help identify repeated faults before outages spread.
No system is maintenance-free. Even premium lights can underperform when poor drainage, nearby trees, or incorrect settings are ignored. I have seen apparently healthy units fail because their batteries were never checked. That lesson deserves attention. A realistic maintenance plan combines field experience, qualified electrical inspection, manufacturer documentation, and local environmental knowledge. This guide explains the practical checks that help solar street lights stay bright, efficient, and dependable through 2026.
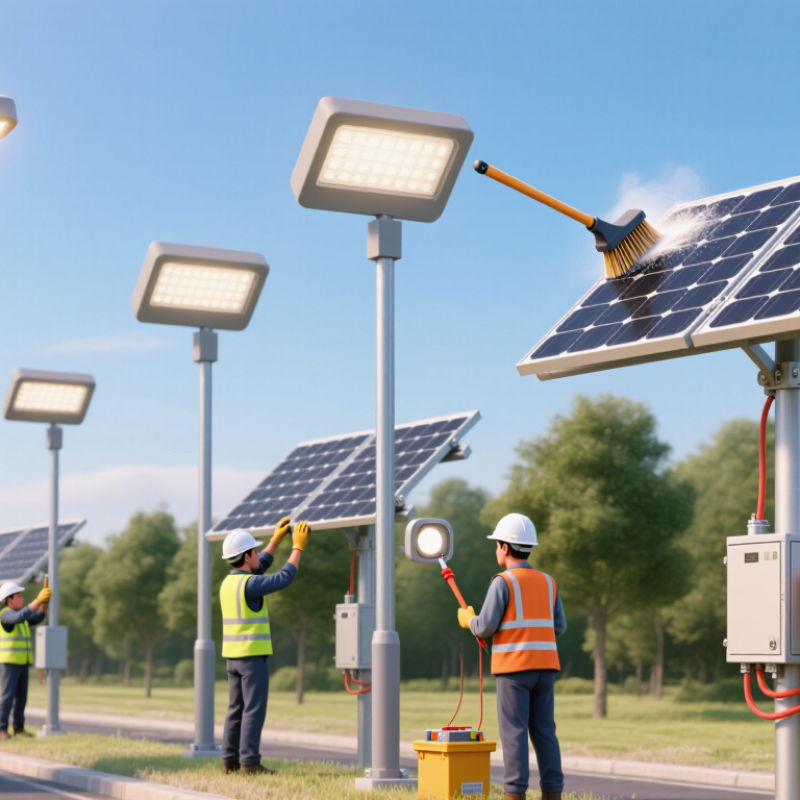
Solar street lights combine several parts that need different care. The solar panel collects energy, while the battery stores it for nighttime use. LED modules, controllers, sensors, cables, and mounting hardware complete the system. Each component affects lighting reliability.
Dust, bird droppings, and leaves can reduce panel output. Inspect the glass surface every few months, especially after storms or nearby construction. Clean it with water and a soft cloth. Avoid abrasive tools. Check the panel angle and mounting bolts for movement. Look closely.
The battery deserves careful attention. Technicians should inspect its housing for swelling, leakage, corrosion, or unusual heat. Battery performance often declines before failure becomes obvious. Review nighttime runtime records and compare them with seasonal conditions. The controller should be checked for error signals, loose terminals, and moisture entry. Keep records.
LED lights usually need less maintenance, but dimming, flickering, or uneven brightness can indicate driver or wiring problems. Clean the lamp housing and confirm that seals remain intact. Inspect poles for rust, cracks, leaning, and loose anchors. Sensor areas should remain free from mud and insects. A missed inspection can happen, particularly in remote locations. For this reason, maintenance plans should include realistic access times, spare components, and documented test results. No schedule is perfect. Field conditions should revise it.
Solar street lights need simple routines, not occasional guesswork. Inspect each unit monthly during the first operating year. Then adjust the schedule according to dust, rain, traffic, and vandalism risks. At dusk, check whether the lamp reaches full brightness. Look for flickering, delayed startup, dark zones, or a shorter operating period.
Clean the photovoltaic panel when dust forms a visible film. Bird droppings, leaves, and salt deposits need faster attention. Use clean water and a soft, non-abrasive cloth. Avoid harsh chemicals and dry scrubbing, which can damage the panel surface. Inspect the battery enclosure, cable glands, mounting bolts, and pole base. Watch for corrosion, cracked insulation, loose hardware, and water marks. Small defects become expensive failures.
The IEA PVPS Task 13 reliability work stresses that soiling losses vary by site and should be measured, not assumed. NREL’s review of photovoltaic degradation rates reported a median annual degradation rate of about 0.5% across evaluated systems. That figure does not predict every streetlight. Local conditions matter more than a neat average. Our inspection sheet is useful, but it is not perfect. Record cleaning dates, weather conditions, nighttime performance, and panel appearance with photographs. After storms, repeat the inspection. Do not rely only on remote monitoring; a clean dashboard cannot show a cracked gland or loose bracket.
Battery, Solar Panel, and LED Light Care
Solar street lights need simple, regular attention. Battery health usually decides nighttime reliability. Check the battery compartment every three to six months. Look for swelling, corrosion, loose terminals, or water marks. Clean terminals carefully and record voltage readings. Replacement timing depends on chemistry, temperature, and daily discharge depth. A battery may fail earlier than expected. That is easy to overlook.
The solar panel needs a clear surface. Dust, bird droppings, and nearby leaves can reduce charging performance. Clean the glass with water and a soft cloth. Avoid abrasive tools. The IEA PVPS Trends 2024 report recorded more than 1.6 terawatts of global solar capacity, but installed capacity does not guarantee strong field performance. Local shading still matters. Trim branches before they cover the panel. NREL research also reports typical photovoltaic degradation near 0.5% per year, although real sites vary.
LED modules need less frequent service than batteries. Check for flickering, dim output, cracked lenses, and blocked ventilation. DOE solid-state lighting guidance commonly lists LED lifetimes above 50,000 hours, but heat can shorten actual performance. Inspect after storms. Small faults become expensive when ignored.
Tips: Clean panels during low-sun hours. Keep a monthly log. Compare dusk brightness and morning battery voltage. If readings look inconsistent, investigate instead of assuming normal aging. Maintenance plans are useful, but field evidence should lead the decision.
Typical annual maintenance frequency for battery, solar panel, and LED light components
Solar street lights usually fail for simple reasons: dirty panels, weak batteries, loose cables, or damaged LEDs. I have found that checking the power path saves more time than replacing parts immediately.
Do not guess.
Turn off the circuit before opening the control box. Inspect the panel at midday for dust, bird deposits, cracks, or heavy shade. Clean it with water and a soft cloth, never abrasive tools.
Check each connector for moisture, corrosion, or loose pins. A multimeter can confirm whether the panel produces voltage in sunlight.
If the light stays off, test the battery next. Compare its reading with the manufacturer’s rated voltage, then inspect swelling, leakage, or overheated terminals.
Replace unsafe batteries through an approved service channel.
A light that switches off early may have reduced battery capacity, incorrect settings, or several cloudy days behind it. Record operating time for three nights before changing the controller.
If brightness flickers, check cable tension and LED connections. A replacement LED module must match the original voltage and wattage.
One overlooked fault is the motion sensor: dirt or a poor angle can cause weak activation. Clean the lens and test movement from different distances.
Never bypass protection features to force operation. That shortcut can damage the controller, and I have seen a temporary repair become a complete nighttime failure.
Keep a simple maintenance log with dates, readings, weather, and replaced parts.
Solar street lights need seasonal care, even when they appear fully automatic. In spring, inspect panels for pollen, dust, and bird droppings. A soft cloth, clean water, and safe access equipment are usually enough. Never scrape dry dirt across the glass. Check panel angles after storms, because a small shift can reduce charging time. Examine poles for rust, loose bolts, and water entering cable openings. These small defects often grow unnoticed.
Before summer, test nighttime operation over several evenings. Record switch-on time, brightness, and operating hours. Compare readings with previous records, not memory. Clean vents around the battery enclosure and remove weeds blocking lower fixtures. In hot regions, inspect battery temperature and ventilation more often. Heat accelerates capacity loss. In autumn, clear leaves from panels and drainage points. During winter, remove snow carefully and check whether freezing water has cracked seals. Do not use salt near metal housings. It encourages corrosion.
Long-term checks should include battery capacity, controller behavior, LED output, and cable insulation. A light that stays on may still be underperforming. Measure voltage and review several nights of data before replacing parts. Maintenance logs should include dates, weather, readings, and repairs. This supports dependable decisions and safer work. A perfect schedule does not exist. I have seen clean panels blamed for failures caused by loose connectors. That mistake wastes time. Recheck assumptions. Replace worn seals and damaged fasteners promptly, while keeping electrical work within local safety requirements.
Check the solar panel, battery, LED module, controller, sensors, cables, pole, and mounting hardware. Each part affects lighting reliability.
Inspect every unit monthly during its first operating year. Later, adjust the schedule for dust, rain, traffic, and vandalism risks.No schedule is perfect.
Clean it when dust creates a visible film. Remove bird droppings, leaves, and salt deposits promptly.Use clean water and a soft cloth.
Avoid abrasive tools, harsh chemicals, and dry scrubbing. These actions can damage the panel surface and reduce energy collection.
Inspect the housing for swelling, leakage, corrosion, moisture, or unusual heat. Compare nighttime runtime with seasonal conditions.Performance may decline quietly.
At dusk, check for full brightness, flickering, delayed startup, dark areas, or shorter operating periods. Record unusual changes with photographs.
Check error signals, loose terminals, water entry, cracked insulation, and damaged cable glands. Small defects can become costly failures.Look closely.
Inspect poles for rust, cracks, leaning, and loose anchors. Keep sensor areas clear of mud, insects, and leaves.Remote locations complicate access.
No. Remote data may miss a cracked cable gland, loose bracket, or damaged seal. Combine dashboard records with physical inspections.A clean dashboard can mislead.
Record cleaning dates, weather conditions, nighttime performance, panel appearance, test results, and photographs. Revise the plan when field conditions change.The checklist helps, but it is not flawless.
Solar street lights are designed for reliable, energy-efficient outdoor lighting, but regular care is essential for consistent performance. What maintenance do solar street lights require? Their main components—including the solar panel, battery, LED fixture, controller, pole, and wiring—should be inspected routinely. Remove dust, leaves, bird residue, and other debris from the panel and light cover, while checking for corrosion, loose connections, water damage, or physical cracks. Clean surfaces gently with suitable tools to avoid scratching or damaging electrical parts.
Battery condition, charging performance, and nighttime brightness should be monitored over time. If the light fails, begins operating for shorter periods, or shows irregular brightness, troubleshoot step by step by checking the switch, wiring, controller, panel exposure, and battery connections. Seasonal inspections are especially useful before periods of heavy rain, snow, strong winds, or extended cloudy weather. Replacing worn components promptly and recording inspection results can extend service life, improve lighting reliability, and support long-term performance.

FLare Solar